Last updated: July 8, 2023 In order to produce my radio-plays in a timely and efficient manner, you
will need to have Sound Effects and Engineer’s binders prepared before you begin
rehearsal. You should also have the actors’ scripts highlighted with their
dialogue lines. It’ll take some time, but this kind of preparation makes for more
efficient
rehearsals--and performances. Each RuyaSonic radio-play script contains all the necessary pages for making
the SFX and ENG binders. You only need to assemble them and mark them up with
colored highlighter pens. For each RuyaSonic script (Christmas Carol,
Headless Horseman,
Auntie
Scrooge, Nativity Play, etc.) follow the steps
below. NOTE: This prep method can be used for radio-plays other than mine,
but my RuyaSonic radio scripts are formatted in the classic 1940s radio
network-style. Conventional stage-play booklets are difficult for radio-on-stage
productions because the booklets have cramped text, unclear cues, italics, etc.
Take a look at
an
example of a professionally-formatted radio play script [PDF] and you
will understand why clarity is so important when doing a live radio-play,
whether on-stage or in the studio. Print-out of the entire document, locate the actual performance
script pages. These consist of the title page, followed by the cast listing, an
optional glossary page, then the dialogue/music/SFX script itself--which ends with “END OF PLAY” or
"END OF EPISODE." Stop
there. This is what you will make paper copies of for everyone to work from. If you
need to create the SFX and ENG binders, you will start with the
dialogue/music/SFX script pages and add the appendix pages marked "SFX",
"MUSIC, "ENG" or "AUDIO" in the top right hand
corner. First, mark up a master script: RuyaSonic radio-play scripts contain pages
of cues that look like this: 3.
MUSIC:
DANGER THEME--ESTABLISH--FADE UNDER.
4* JOHNNY-BOY: Look out! They've thrown a refrigerator out the window!
5. LIVE SFX: REFRIGERATOR CRASH. WALLA-SCREAMS.
6* SUZANNE: (GASP) Oh no! Johnny-Boy's flatter than a pancake! 7. NARRATOR:
(SIGH) Sadly, Johnny-Boy wound up just one more ghost.
Meanwhile, Kitty had to deal with ghosts of a different sort... Add the timing "Q" marks: In radio-drama, an ensemble must coordinate delivery of their cues at
just the right time. For example, music must be established before allowing
an actor to speak; Or, a sound effect must be fully heard before letting an
actor react to it. These require timing coordination. The RuyaSonic radio-play scripts have asterisks beside the cue numbers to alert the
director, cast, and crew that they must pay attention to this cue
at a timing determined by the
director. In rehearsal (or performance), the director may point to a actor
or SFX artist signaling exactly when they want them to begin
a line or SFX cue. At other times, the performer must merely be conscious that they
should delay delivery until the previous cue reaches a desired point. The script
indicates when these important timing cues occur by adding an asterisk to
the cue number (like 4* or 11*). To make these asterisked-cues
stand out, add a hand-written timing "Q" mark to
the master script beside each asterisked-cue number. All copies made from this master script will
now contain these easier to see timing Q-marks. Take the master script and, using a
Sharpie pen-style
marker (not a highlighter), hand-write a fairly-large "Q" besides
any cues that have an asterisk beside the cue number. (Like 4*) These timing Qs generally occur after
underlined music cues or
SFX cues or just after a scene change. EXAMPLE: 3.
MUSIC: DANGER THEME--ESTABLISH--FADE UNDER. Q
4* JOHNNY-BOY: Look out! They've thrown a refrigerator out the window!
5. LIVE SFX: REFRIGERATOR CRASH. Q
6* SUZANNE: (GASP) Oh no! Johnny-Boy's flatter than a pancake! 7. NARRATOR: (SIGH) Sadly, Johnny-Boy wound up just one more ghost. Meanwhile, Kitty had to deal with ghosts of a different sort. Note that yellow highlighting in
scripts may not show up well with stage-lighting or in dimly-lit studios.
I prefer
ORANGE Sharpie Accent
highlighters, get a 12-pack like this set--at Amazon. NOTE: Yellow highlighting tends
to disappear on-stage (and in dimly-lit studios). Orange, pink and green
highlighters show up much better. Try to minimize any use of yellow
highlighting, even for notes.
For each character in the show, write the character's name on the title
page and take an orange, pink or green highlighter
to highlight just the dialogue for that character. Do NOT highlight the
character name along with their dialogue. See below.. EXAMPLE: For the Narrator's script, hand-write "NARRATOR" on the title page
(with a Sharpie-style
pen) and
highlight only the Narrator's lines and
parenthetical instructions. 7. NARRATOR:
(SIGH) Sadly, Johnny-Boy wound up as just one
more ghost. Meanwhile, Kitty had to deal with ghosts of a different sort. Here, the highlight begins with the parenthetical delivery instruction of (SIGH) and ends with
the spoken-words “different sort.” Highlight the dialogue for each major character
in the different actors' scripts. If you have more
character roles than cast members,
consult the cast listing page of the script to determine which roles can be combined, then use a different
color to highlight the secondary roles in an actor’s
script. When actors are doubling up roles, their script will have two different colors in it.
Using different colors makes it easier for an actor to keep straight which voice to
use when playing two
characters in one scene--they can even talk to each other. If all their lines
are highlighted in orange, the actor may use the wrong voice for the second character's
lines. Actor's scripts should be stapled (or bound with single 1-1/2"
loose-leaf book rings) in the upper left corner--to make for
easy page turning. NEVER USE BINDERS for radio actor's scripts--they cause noisy
page-turns and the double-wide orientation makes it hard for 2 or 3 actors to share
the same mic. Begin with one of the master Q copies and then take the non-script pages--the Engineer
or Audio section from the appendix.
Put that section into the script
just before page-1/cue-1 (in the scirpt's dialogue/music/SFX section). Use several highlighter pens for the Engineer's binder: pink, orange and
green are good. Use the pink highlighter for all the music cues in the script FOR EXAMPLE: 1. MUSIC: [MUS-01]
INTRO THEME. UP AND UNDER. CONTINUE UNDER. 1. MUSIC: [MUS-01]
INTRO THEME. UP AND UNDER. CONTINUE UNDER. NOTE: The bracketed code, [MUS-01] indicates using playback device "MUS"IC
and track number "01". This device could be a CD-player, a computer,
or a tablet running a theatrical playback app. For complicated shows,
two playback devices may be necessary, as this allows you to quickly go from one cue to another and even cross-fade
between them. Additionally, you can trigger music and pre-recorded sound
effects tracks using two playback devices--one for each. Now determine how long the music cue should play. Is it merely a "bridge" between scenes--with no dialogue to be
accompanied by music? If so, highlight just the music cue. Does the music play underneath dialogue--a "BED"? The cue
instructions may say "--UNDER" or "PLAY THRU ENTIRE SCENE" If so, listen to the music track and read the dialogue aloud
while the music cue is playing. Read at a natural pace--maybe even a bit slower than
normal. Notice where the music fades or ends. Draw a vertical highlighter line
beginning with where that music cue started, on down through the dialogue and
SFX cues to where the music track ended. Bridges will be very
short and Beds very long. In some cases, the music must end at a
particular point--such as the end of a scene or action sequence. Indicate
that with a short horizontal highlighter line at the end of the vertical line--looking
like an upside down "T".
In other cases, you may wish to fade out the cue under the dialogue (Notated
in the script as "FADE UNDER"). Indicate
the instruction to fade with a wavy vertical line--like an wavy "S". Repeat this procedure for all music cues
in the script. Review the information in the ENG or AUDIO section of the script
appendix, to see if reverbs or
telephone filters are required. If they are used, read through the
script looking for production notes about filters or reverbs and also for
dialogue lines beginning with [FILTER] or [REVERB]. If you find any,
make a short green horizontal mark highlighting the character’s name and
the effect label (FILTER, REVERB). This alerts you to these important
sonic effects, which may have to be turned on or off--or adjusted while
the character is speaking. NOTE: The "filter" is an electronic device that simulates a telephone or
walky-talky radio effect. You may wish to use a manual device to get this effect--like
having the actor speak into a plastic cup or coffee mug. If you use an electronic filter,
then the engineer may have to turn the effect on for a regular mic, or the actor may have to go to a special mic. In all cases, highlight the ENG script
so the engineer knows this line is supposed to have the effect. 7. OPERATOR: [FILTER] What number are you dialing? Here you would use a green highlighter to color the script in a horizontal
line from “OPERATOR:” to the end of [FILTER].
7. OPERATOR: [FILTER] What number are you dialing? If the character has more effected dialogue below this line, then
draw a vertical line through their lines until they are done using the
[FILTER] This will indicate to the engineer just how long the
effect is in use. For reverb effects, you will do the same highlighting, but use the
orange
highlighter. (Don't use blue, because often tech booths often employ blue
lights--which would makey any blue highlighting invisible.) EXAMPLE: In my Christmas Carol, Scrooge's voice has been
bathed in slight reverb whenever he's been accompanied by ghosts. In the
graveyard, as he pleads to return home, a production note indicates the
engineer should gradually decrease the amount of reverb on Scrooge's mic
until it is completely "dry." This sonic treatment conveys how Scrooge
has returned from the spirit realm to normal life. Highlighting those
important instructions will ensure executing them in every performance. Once the music and effects device cues have been highlighted in the
Engineer's script, put the script pages into plastic page covers in the ENG
binder. Arrange
pages so that Page 1 and Page 2 will open together--with page 1 on the left
and page 2 on the right. Then insert all other pages back-to-back this way.
Now the engineer has two pages open at a time and can see ahead when the
show is performed. From the non-script pages--the ones in the appendix--take the
pages that have SFX in the top most right hand
corner and put them into the script just before page-1/cue-1 of the dialogue script.
For the SFX binder, use several highlighter pens: orange, pink, blue, green,
etc. For LIVE SFX, start with the listing of Sound Effects Roles,
using one color to highlight
all the SFX for each SFX artist. Highlight all of these in say, green. EXAMPLE:
SOUND EFFECTS ARTIST #1:
Proceed to the other artists and do the
same using other colors. EXAMPLE:
SOUND EFFECTS ARTIST #4: Then go to pages SFX-2 and SFX-3 and use the same colors to
highlight that artist’s SFX for the “How to” information. This will be
used to train the SFX artist. Then move onto the script pages. Look for the SOUND cues and when you see an
entry for say, FOOTSTEPS, highlight it in the same color that you used to
highlight the SFX artist for that sound. 6. NARRATOR: Jimmy froze when he
heard the lynch mob arrive at his door. They meant business.
7. SOUND:
FOOTSTEPS.
DOOR KNOCKS (3X)
8. JIMMY:
Um... Jimmy's not here right now.
9. SOUND:
POUNDING ON DOOR (5X) WALLA--ANGRY
MOB.
Here, you would use the green highlighter for the FOOTSTEPS--indicating
that SFX Artist #1 perform the footsteps sound effects. If the sound
continues through other dialogue or music cues, draw a vertical highlight to
indicate how long the sound should last. It’s up to you to decide just how
long the effect is necessary. Decide for yourself, but keep in mind that the
FOOTSTEPS must end before some other SFX cue for SFX Artist #1 comes up. You normally don’t want the same SFX
artist to have to create two sounds at once. The Door Knocks would be performed by SFX Artist #4. The
WALLA would be by either designated cast members or the SFX team or a separate
WALLA team. Repeat this step for each sound effect until all are highlighted. If you have
several SFX books to make, do one master book first and then use it as a model
for the other books. It can take an hour to finish five SFX books. If you have a lot of walla-crowd sounds, don’t include the walla
highlighting in the SFX books. I often make a separate book just for walla
cues. If I have more actors than I have main speaking roles, I can give them
the Walla book and let them perform the walla. Once the sound effects cues have been highlighted in the SFX script, put the script
pages into plastic page covers. Arrange pages so that Page 1 and Page 2 will
open together--with page 1 on the left and page 2 on the right. Then insert
all other pages back to back this way. Now the SFX artists will have two
pages open at a time and can see ahead when the show is performed. For TRACK SFX, start with a plain marked-up script and highlight
all TRACK SFX cues. See the instructions in section 4 above
(ENGINEER'S BINDER) above, but here, highlight BED Track SFXs--such as wind & thunder
that runs beneath dialogue, then draw a VERTICLE highlight
down through any dialogue or SFX or Music cues in that scene. Then highlight brief
"SPOT" Track SFX cues in a different color--as they will be triggered on top of the
already-playing BED track SFX. EXAMPLE: 3. TRACK SFX: [FX-13] WIND
& RAIN--UNDER ENTIRE SCENE. 4. CAP'N: We'll be safe--as long as there's no lighting to strike the mast. 5. TRACK SFX: [FX-14] THUNDER-CRACK--LET
IT FINISH. 6. CAP'N: Arrgh! It's toppled the mizzenmast. We're goners
for sure! At workshops, I can produce my short (25-minute) "genre" radio plays in
about two hours--that's from auditions to
rehearsal to performance/recording. Longer plays (60-minutes to 100-minutes)
take more time--say 3 to 4 hours. Stage-play veterans marvel at how quickly a
troupe can produce quality work, but the method I use is how 1930s-1960s network
shows were produced. On a radio network, the sheer number of shows aired each day required an
extremely efficient system of production. This system skipped standard stage-play
rehearsal methods. There were no table-reads, no blocking rehearsals, no
multiple run-throughs, no giving director's notes only at the end of a run, etc. However, there isn't only one way to produce radio plays. Traditional
stage-play rehearsal methods can supplement my method--if only to make actors
(or directors) feel familiar with the
process. Following the instructions in steps 1-5 above, I have highlighted each actor's script for their
specific characters' dialogue--as described above. Similarly, the SFX binders
have been highlighted as to which crewmember does which sound effect cue in the
script. The engineer's binder has also been prepped, highlighting all cues for
pre-recorded music or SFX-tracks and any instructions regarding special
requirements (turning on reverb on a mic for particular lines, any telephone
effects, fade outs, etc.) NOTE: The following steps can take place on the same day--over the course of 2-3 hours. This is NOT the stage-play style of tech-rehearsal, jumping from
"cue-to-cue". In radio, we do the entire play--every cue
(dialogue, SFX, music) in order. NOTE: The slow pace of the All Cues Rehearsal often makes things appear dismal. But the "Old Radio Speed Trick" greatly improves the show--and the spirits of director, cast & crew.
You'll be amazed at how well things go. The speed-trick works on the same
principal as riding a bike: if you go too slow, it's dreadful and wobbly, but
once you get up to a decent speed, not only do you stay upright, but you can
really go places. Since 1996, I have directed hundreds of radio plays using this method. It works with
students and amateurs, but even Hollywood professionals are quite impressed with how efficient and
actor-friendly this method is. You get quality results without tedium--or
browbeating.
How to Prepare Radio-Play Scripts for Production
Preparing Actors' scripts, plus the Sound effects artists' and engineer’s binders
1) Preparing the Master Radio-play Script
2: Script Copy Logistics and Office Supplies

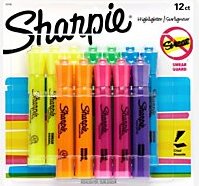
Sharpie's Accent chisel tip highlighters are great for radio-on-stage-shows
You will also need several different color highlighters for the various cues
in engineer's and SFX artists' script binders. Get something like these
Sharpie accent highlighters, multi-colored 12-pack -- at Amazon
Note that because the pages are back-to-back, you only need only half
the number of plastic sheet-protectors as you have script pages--per
binder. Get
anti-glare, top-load, 8.5 x 11 plastic sheet-protectors like
these--at Amazon.
3) Preparing Radio Actors' Scripts
Highlight dialogue for each character-per-actor:
4) Prepare the Engineer's Binder
Music Cues:
Highlight that entire line with a pink (or magenta) horizontal line. Cover
ALL the words of the cue in
color. Effects Device Cues:
Put script pages into plastic sheet-protectors
5) Prepare the Sound Effects Binders
FOOTSTEPS.
WIND MACHINE.
CRASHING.
THUNDER RUMBLING.
FLAPPING WINGS.
DOOR KNOCKS
POUNDING ON DOOR
EXAMPLE: Put script pages into plastic sheet protectors
6) The RuyaSonic Radio-Play Production Method
Preparation
Casting
Rehearsal, Part 1
Since nobody knows which role they are playing yet, they pay attention to every detail.
They learn the whole story, the themes, the approach. If they knew they
were the playing the villain, say, they wouldn't pay much attention to any scene the villain
wasn't in. Withholding the casting info keeps everybody engaged.
The "All Cues Rehearsal" - at 75% tempo
Performance/Recording
The director will use hand-signal of "drawing a circle" to indicate "Faster!"